반응형
findViewById쓰면 코드가 길어집니다.
뷰 바인딩은 findViewById 대체하는 겁니다.
뷰에 접근하는 하나의 방식입니다.
안드로이드 버전 3.6부터 사용가능
findViewById에 비해
Null 안정성↑ >> 유효하지 않은 view id를 참조하지 않기 때문
Type 안정성↑
컴파일 속도↑
코드 간결성 ↑
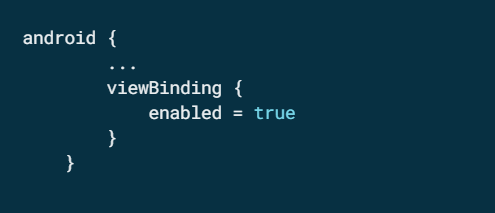
사용법은
Gradle에서 뷰 바인딩 속성을 true해주면
모든 layout에 대해 바인딩 클래스가 자동으로 생성된다.
뷰 결합 | Android 개발자 | Android Developers
뷰 결합 뷰 결합 기능을 사용하면 뷰와 상호작용하는 코드를 쉽게 작성할 수 있습니다. 모듈에서 사용 설정된 뷰 결합은 모듈에 있는 각 XML 레이아웃 파일의 결합 클래스를 생성합니다. 바인딩
developer.android.com
역시 안드로이드 문서는 친절하다.
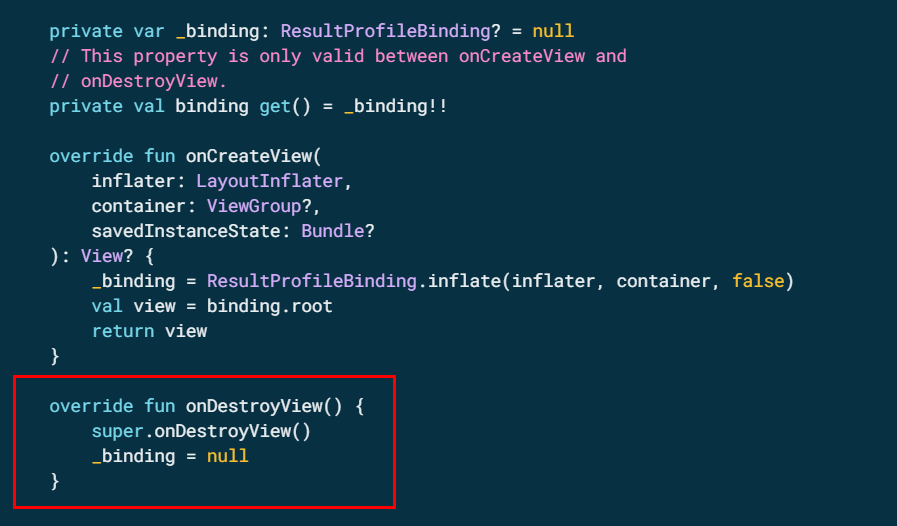
프라그먼트에서는 onDestroyView에서 null해줘야한다.
안드로이드 뷰 바인딩(view binding)
1. 뷰 바인딩 1-1. 라떼는 말이야... 1-2. 변천사 1-3. findViewById와의 차이점 2. 사용법 2-1. gradle 추가 2-2. 액티비티 2-3. 프래그먼트 2-4. viewBindingIgnore 1. 뷰 바인딩 1-1. 라떼는 말..
todaycode.tistory.com
View Binding
View binding 을 사용해보자!
thkim9373.github.io
class MainFragment : Fragment(){

    private var _binding: FragmentMainBinding? = null
    // This property is only valid between onCreateView and
    // onDestroyView.
    private val binding get() = _binding!!

    override fun onCreateView(inflater: LayoutInflater, container: ViewGroup?, savedInstanceState: Bundle?): View? {
        val v = inflater.inflate(R.layout.fragment_main, container, false)

        _binding = FragmentMainBinding.inflate(inflater, container, false)
        binding.btnMain.setOnClickListener { (activity as MainActivity).event() }

        val view = binding.root
        return view
    }

    override fun onDestroyView() {
        super.onDestroyView()
        _binding = null
    }
}
반응형
'IT > Android' 카테고리의 다른 글
| Jetpack Compose 입문 (0) | 2021.11.18 |
|---|---|
| 깃허브 할로윈 (0) | 2021.10.31 |
| 안드로이드] viewpager2 하단 점 / page Indicator / TabLayout (0) | 2021.10.07 |
| 안드로이드] Error inflating class com.google.android.material.tabs.TabLayout (1) | 2021.10.07 |
| 안드로이드] ViewPager PageIndicatorView (0) | 2021.09.29 |

댓글